Spectrum Next Mini Progress

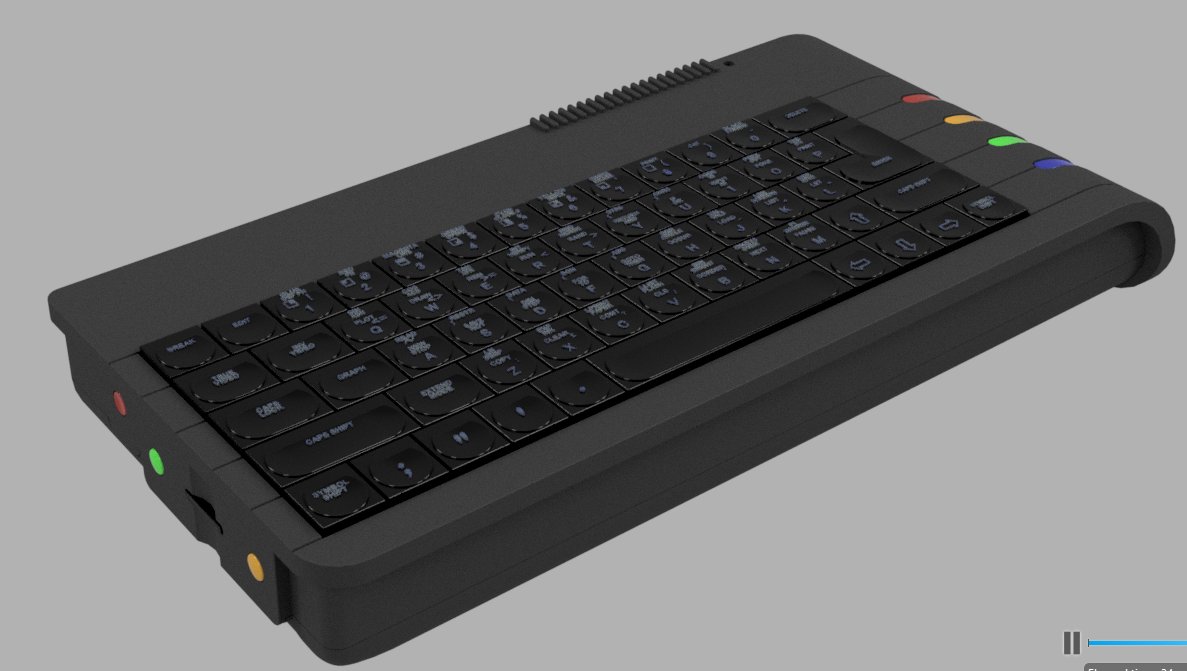
Had chance to spend some quality time with my loved ones The computer. Have started on the final stages of getting the Next Mini ready.

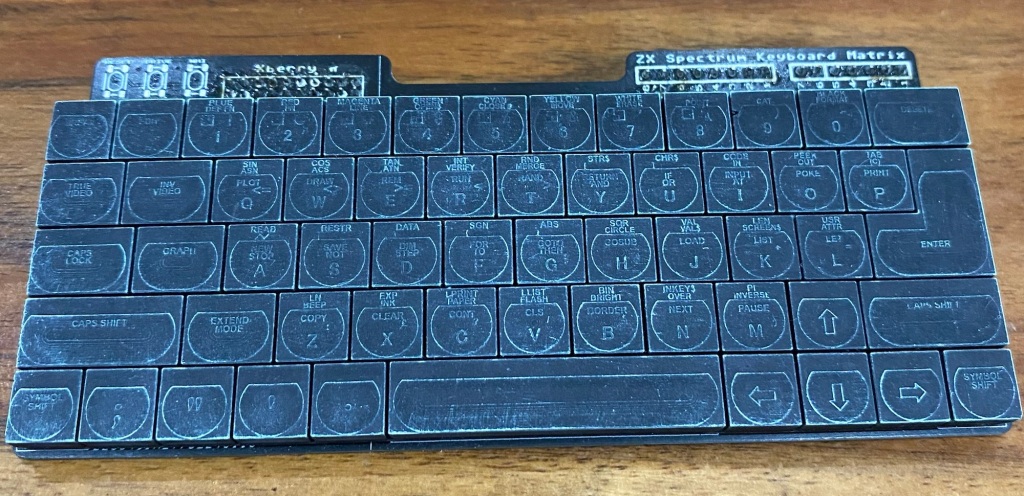
Needed to finesse the keyboard design a little to allow for better fitting inside the Next mini. Have been mindful that it’s also designed to be standalone so the PCB isn’t an ‘odd’ custom shape like my previous iterations were and can be easily sit inside a standard rectangular case if need be.

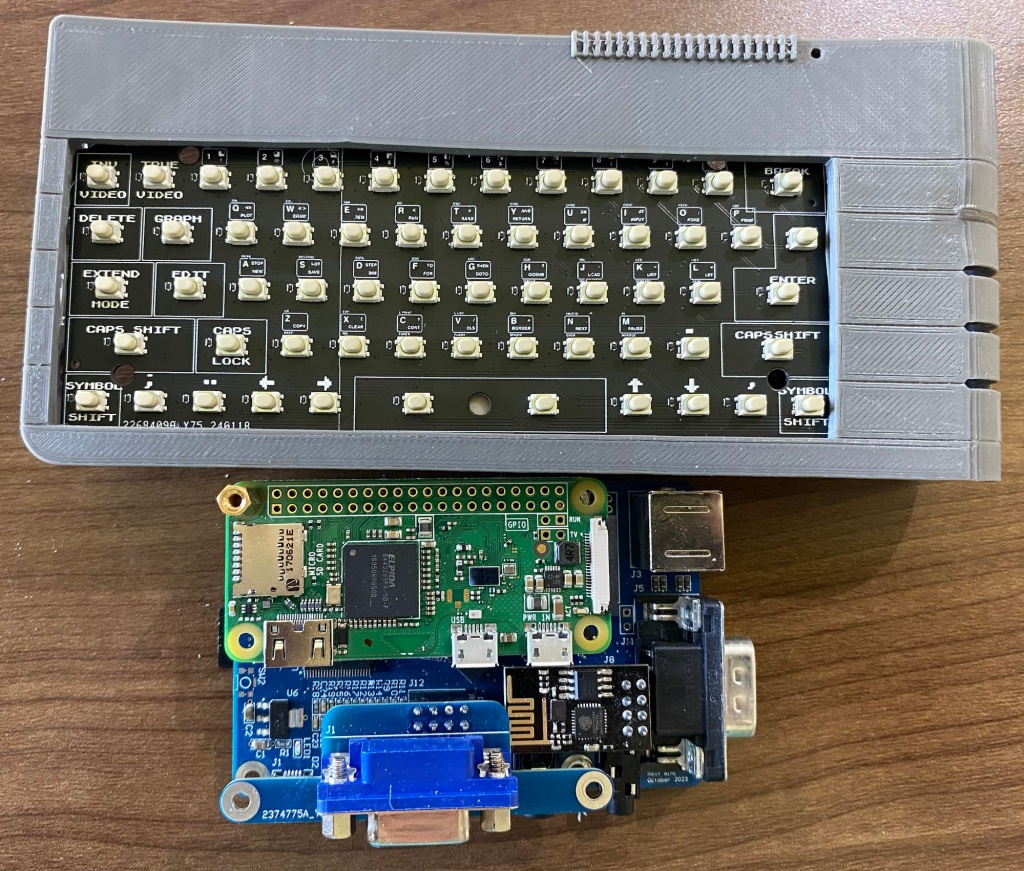
Have designed a Middle board (in yellow in the images) to accommodate the PS2 (keyboard / mouse), DB9 (Joystick) , Power LED, Micro SD slot and the side buttons. I’m planning on using the Xberry Pi without any mods so it complicates things a little.

Still not quite sure how to handle all of those electrically yet – but there’s quite a few options available, even if worst case, someone has to solder a bunch of wires in place

XBerry Pi  based Next Mini
Cutaway view

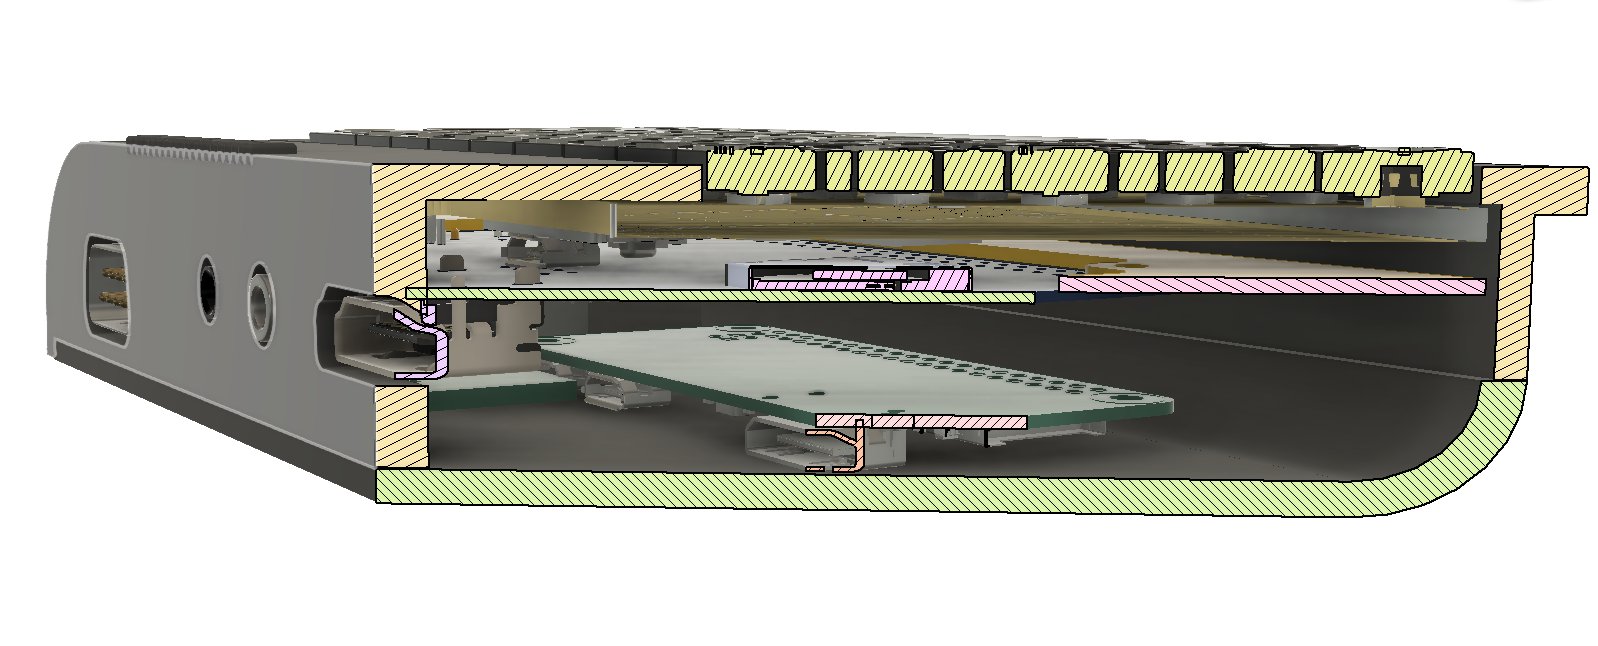
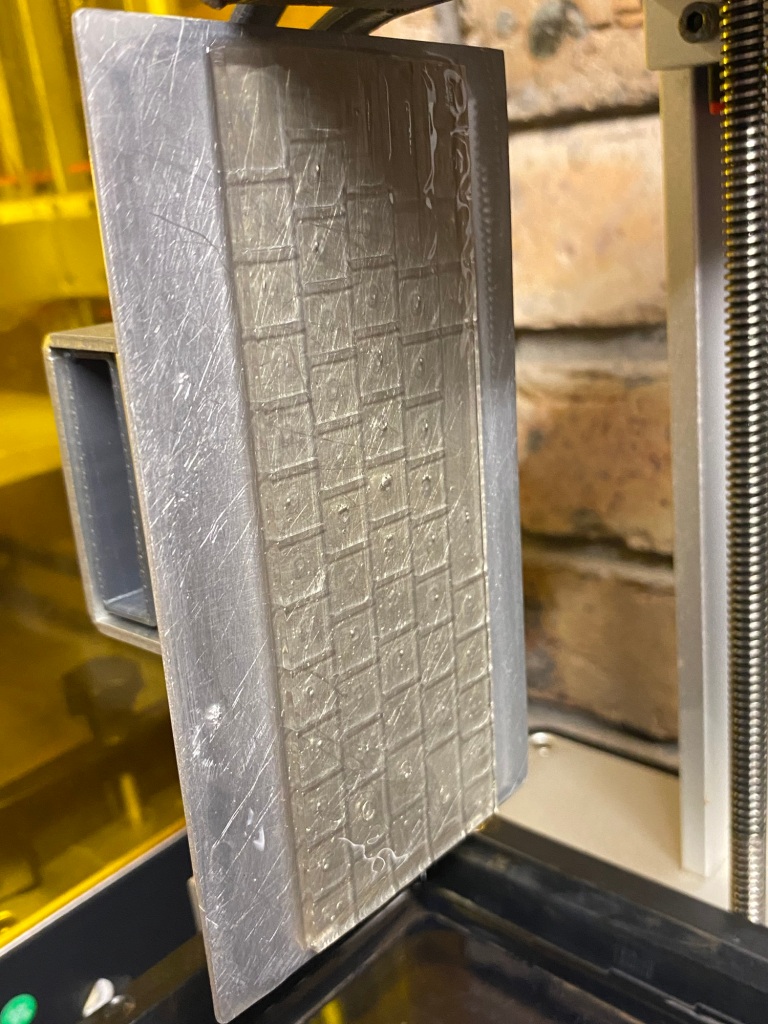
If you count the Rasperry Pi zero, and the ESP-01 wifi device, there’s FOUR layers of PCB’s, two custom PCB’s and over 70 3D printed items (well, less than 20 if you now count the keycaps as 5 items which is how they come off the printer!)

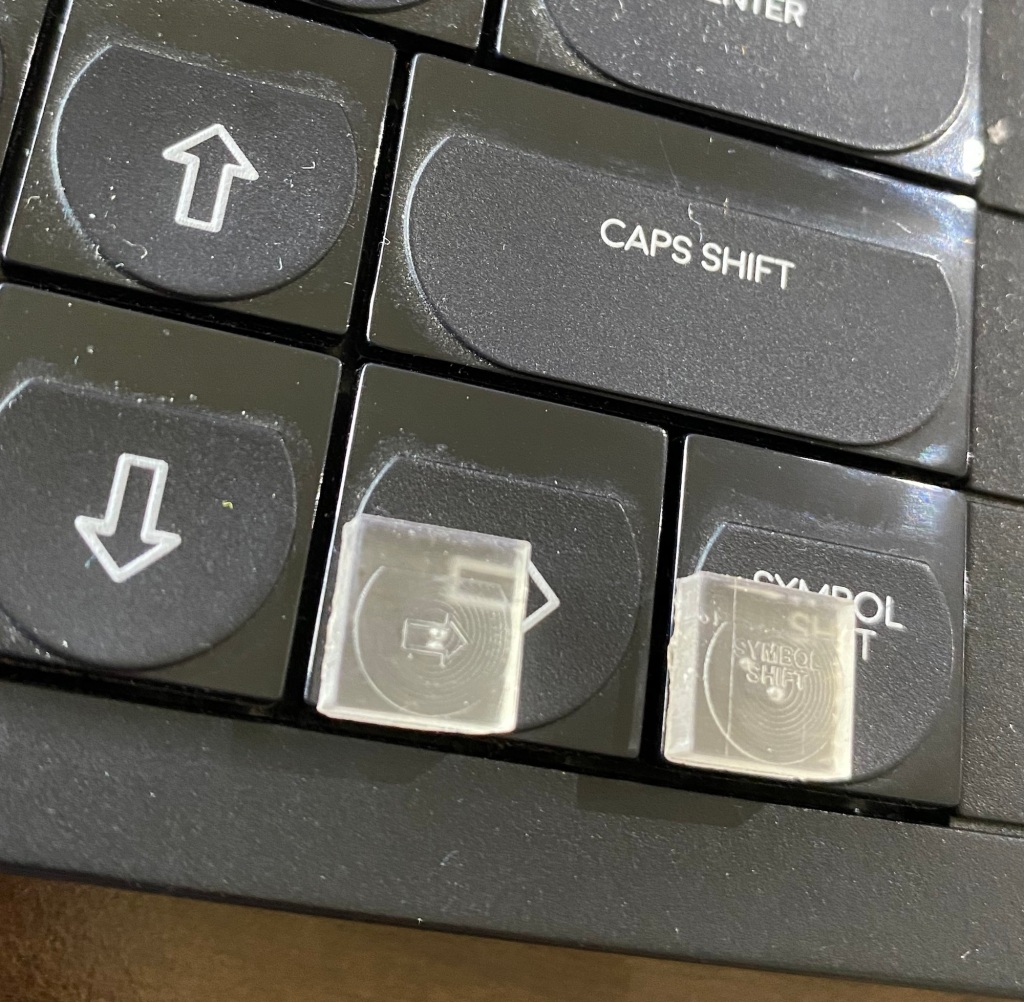
Just spotted that i’ve not put the power LED in place yet…then there’s the potential blinkenator-ish illuminated inserts, then, then, then…………

Trying to be a perfectionist! (Next Mini)

It’s been a couple of weeks of iteration and maybe ten actual prints between these two prints!

In person, the difference is very notable. more subtle in pictures.

This is as good as it gets for a standard set of keycaps 🙂 I’m finally happy.

Now I can really get stuck into experimenting with getting those legends white! I have three ideas, one may be limited somewhat by the viscosity of water!

Spot the difference!

Tiny keycaps – Spectrum Next Mini.

Spot the goof up!
Four by four makes one!

I’m going to write to those Fox’s Glacier Mints people and suggest they make tasty keycaps!

After two days of hunting, Found a paint scraper to remove the keycaps off the printer !

Also Bought some IPA to clean the keycaps up…

But…I’d forgot to actually prepare the slicer properly for printing.

I’d planned to just print straight on the bed without supports.

I forgot to remove the first base layers / brim / whatever it’s called so there’s no hole on the underside of the keycaps!

Ah well!

I’ll re-slice and reprint tonight, it’s an hour to print, so very quick to iterate!

Also, can’t find my curing station, and it’s raining today…d’oh!

Next Mini keyboard – ready to print!

But, forgot to buy IPA to clean the thing off once printed.

Found a Very well priced 5L of 100% IPA at Sydney Solvents for $35 delivered!

Now, if in a rush, I could pay $10 for 125ML at Bunnings

Here

Or even a more reasonable 250Ml for $14 at Jaycar

Here

(They even have 5L for $76!!)

But, I’m stingy, anticipate that I’ll need quite a bit (even though it took me two years to not use 5L back in the UK due to fastidious recycling)

So, summary, I’ll

Be printing key caps next week at the latest!

Then I’ll re-do the Next mini PCB a little bit too!

Prototype mini keyboards have arrived!

As suspected, a few minor goof-ups already spotted on the Next mini one, and the C64 one too. The Amiga one’s looking ok so far….

Still a few weeks of testing needed though before a production run can happen!

Sinclair Spectrum Next mini, next to an Xberry Pi.
All the minis

Prototype keyboards incoming

Woooo!

Should be here next week, not long till I find out how badly I’ve cocked them all up and how much work needed for a re-spin for production!

I purchased 2000 switches so can re-spin and re-test one, possibly two depending on which one (the Amiga needs 500 switches for 5 keyboards, spectrum needs far fewer!!)

Exciting times, now gotta get off my bum and fire the resin printers up.

Yep, these are WORKING keyboards for the

The A500 Mini Amiga

The C64 Mini Commodore 64

And

The Spectrum Next Mini (an Xberry Pi case) which is a 50% X &Y (100% Z) scale next mini styled case.

Super LED Blinkenator 2000 – Beta …Err, lost count!

BETA 12….ALMOST IDENTICAL TO BETA 11

Beta 11 had a minor cock-up in that i’d missed off the 3v3 line. I’ve also taken the oportunity to shift things around a bit, re-align stuff and generally do a lot of really picky small stuff that generally makes me feel a bit better. Except that upside down C22 that i’ve just spotted, D’oh!

Also, I now introduce 2 more members of the Super LED Blinkenator 2000 family

The Clampinator

This one, you’ve kind of met before. It’s a small ‘clamp’ PCB, but it now splits into two parts. One ‘spacer / shim’ sits in-between the Clampy larger bit, the other, is the clampy larger bit.

When installed, it’ll look a little something like this…..

Blue is the Next PCB. Red is the tiny thin break-off ‘spacer’. Black is the Blinkenator.

The Red ‘shim’ part stops the yellow clamping PCB from getting too close to the Blinkenator when the screws and nuts are tightened.

That combination of PCB’s, copper balls, nuts & bolts provides a robust electrical contact to J15 – Without needing to solder. Yes, it’s a little fiddly – I’ll make some instructions.

Another Member – The Programminator

Glorified serial to USB convertor

Now i’ve switched over to a SMT atmega chip, it needs programming. I’ve bought some of the important signals out to a PCI EXpress connector to make for me, at Bleugh.Biz headquarters to quickly program the on-board arduino and test some basic features.

I thinkn REV 2 of this board could be useful for general tinkering also, so i’ll probably do a limited run to sell if people really want them. I’ll send out a handful of REV1 of this board to the BETA testers, IF BETA12 works.

And, finally – a quick overview of the new layout and routing. I’m now confident enough in the design to use a copper pour for a much more professional finish!

The Balls don’t really work :-( [EDIT – Now they do!]

D’oh!, Blinkenator Beta 9 board arrived. Powers up just fine and works ok too

BUT….I Can’t seem to get quite enough clamping force with the balls between the PCB’s to get a reliable I2c connection.

Surprisingly, as the power is closer to the edge of the connector, it powers up reliably, 100% of the time! the I2c is right at the centre where the most flex is, so makes the least contact……

If I really press hard, it works a treat.

Couple of possible options open now

1 – Something very stiff jammed inside and use the case itself to press against the board (I don’t like this)

2 – Some other, softer conductive metal thing

3 – yet another redesign (TM) – I have some ideas, but i’m concerned at the spring forces required to obtain a contact

4- give up on a ‘solderless’ design. – I’m trying hard to not alienate a bunch of people by requiring soldering, but at some point I may need to call it quits. With the new VAT rules kicking in, more parcels are being charged VAT and handling…prototyping has gone up by 25%!

Just a quick update to say I’m still working on it

Spectrum Next Blinkenlights…More progress Inserts

The CAD for the clear plastic parts of the inserts is coming on well. I’ve just ordered a handfull of these to be Resin printed…..

Some extra features –

  • 339 small 0.25mm dimples to help diffuse the light!
  • Strain relief for the PCB – the two slots on either end will help slightly mis aligned PCB’s to sit in the cutouts
  • Much thicker top layer to help with light diffusing

Spectrum Next Blinkenlights – part 5 – More PCB’s

Specnext inserts - 4mm Hole drilled - Bottom Up looking
One idea that I may need to do –  Partially Drilling out the 1.6mm holes to a wider diameter – to allow for easier Inserts PCB manufacture


Specnext inserts - 3.2 mm Hole drilled - Top Down
Potential idea – drilling out the hole from the underside – you can almost double the diameter without touching the case – This could be quite tricky to get right though…


Continue reading “Spectrum Next Blinkenlights – part 5 – More PCB’s”

Something on the side – Spectrum Next Blinkenlights

Back a few years ago (wow, it was that long!) I backed the Spectrum Next

Problem is, those lovely coloured bars over on the righta2ql6z-spectrum-next-black-1.39

They’re not LED’s………….

Well, I’m gonna try to fix it……

Continue reading “Something on the side – Spectrum Next Blinkenlights”

8 Bit computers and a new 2018 Crash Annual!


A little something different as I work up to posting some new content after the summer hols….

If you’ve ever owned one of the 8 bit computers of the 80’s and early 90’s, this is a MUST purchase magazine…

I’ts focus is the ZX Sinclair Spectrum (AKA the speccy / rubber beermat) and last years 2017 annual was fantastic

For an absolute steal of just 15 quid, hardback!

If your significant other (or yourself) has reminisced about days gone by…or wants to see what’s happening in the scene today, get this!

https://www.kickstarter.com/projects/47744432/crash-annual-2019-issue-100/widget/card.html?v=2“>https://www.kickstarter.com/projects/47744432/crash-annual-2019-issue-100/widget/card.html?v=2

http://kck.st/2NRZ1zB

https://www.kickstarter.com/projects/47744432/crash-annual-2019-issue-100/