Blinkenator – Beta 11

Have had quite a few ‘spare’ hours to tinker these past few weeks. Finally have gotten over a little bit of a hill and put some development time back into the SUPER LED BLINKENATOR 2000

Thanks to some fellow hardware developers for keeping me sane!.

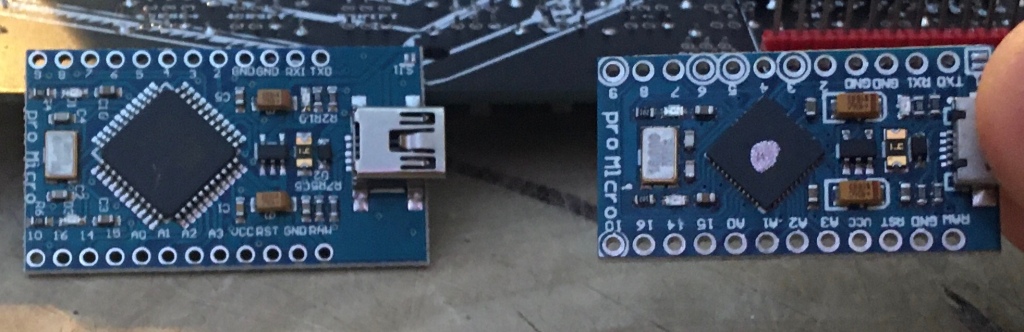
The changes to this board – Mainly switching from a soldered on Arduino Pro Micro to using a discreet Atmega328p chip which is commonly found in the Arduino Pro Mini

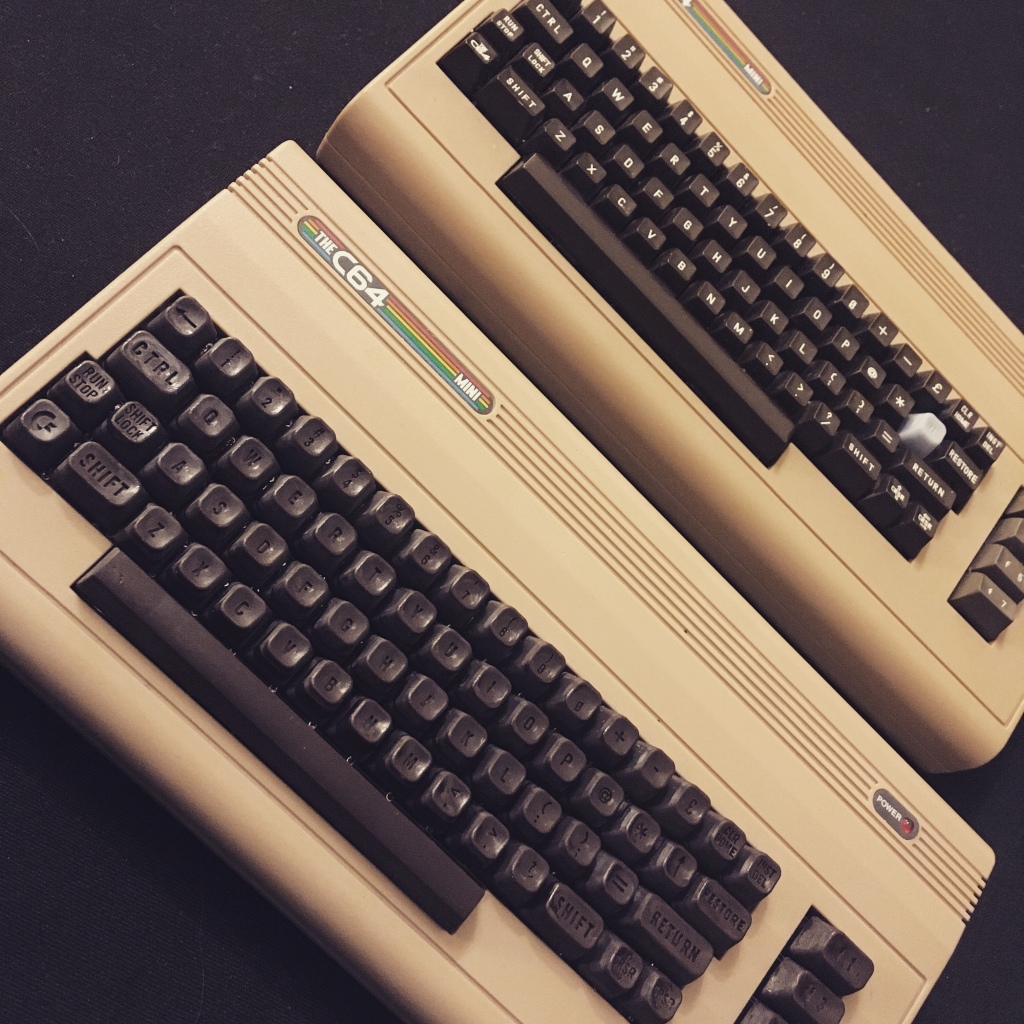
My previous choice of Micro was mainly driven by attempting economies of scale and using the same one for the C64 Mini keyboard kit as this. Also, a desire to allow people to ‘program up’ their own Blinkenator board – The Atmega32u4 is a bit of an overkill for a handful of LED’s though. Importantly also, prices of arduinos have risen quite a bit since Brexit . Changing to a chip saves easily 60% in hardware costs over the soldered on Arduino, it also saves a handful of minutes in soldering!

It does introduce a little more complexity – I now need to figure out how to ICSP – In Circuit Serial Programmin works as i’ll need to burn an Arduino bootloader to each one.

I’ll also need to develop (or modify) a Programmer to allow a more day-day use of the device over UART to USB

Next step, port the Blinkenator to the 328p, test, if it works, Order Beta11

Oh, the Ball clamps are working superbly, just gotta be careful of feature creep on that clampinator board now!

oh, probably will look at swapping the JST connector footprints to SMT – would be nice if I can have just the

Tolerance!

The mechanical, fitty holey type tolerance, not the other type of ‘oh, that’s annoying, but i’ll put up with it’ type….

Here’s the keyswitch fitting into the space bar. zoom in. we’re talking fractions of a millimeter fit, which I can achieve consistently and reliably! there’s about 0.1 mm available on the sides with the latches and about 0.2mm availavle on the longer sides. the extra really being there to allow some grace when placing the keycap on to fit it. less clearance means it’s a royal pain to get the switch located into the hole.

BUT, the keys don’t ‘latch’ into place on the switches. So, to try to address that (if it’s even possible) i’m now adding a small feature

See that bit in Blue!

This is the underside of one of the ‘F’ Keys. That small part in blue is a 0.1mm ridge sat about 0.8mm up from the bottom and 1mm from the top. I’m hoping that will be enough to latch the keys on, AND allow ease of fitting without breaking the keycaps. Everything else is done now, this is the only barrier to releasing. I’ll run off a print tomorrow to see how it works out. I’ll run off further prints with this sticking out even more if i need to

Just one more Tweaketto! Give it to me…C64 keycap sales are soon to be..

Nailed it!

Happy chappy this morning. They finished printing last night, my draining widget worked a treat – I’ll put a quick GIF up soon.

But, forgot about them until a mad panic at close to 1AM remembering I’d left them on the printer. With these, you can’t as the resin in the concave surfaces will part set in the morning and cause an uneven surface.

So, quickly washed them in IPA, regretted it immediately as it was dirty. Did another wash in IPA to clean the resin and straight to the hot water tap and larger bowl with a brush to clean off the bits. I’ll strain out the bowl later.

Final tweak needed now is the amount of grip to the switches themselves, shrinkage is variable at the moment, can’t go too small or keycaps may break when putting on, can’t go too big or they’ll be too wobbly and fall off.

May need to go middle ground and require a tiny blob of something sticky in each keycap, I’ll know soon enough!

Space Bar, The final frontier

The final hurdle for ‘good enough’ for me now is the space bar.

Every key prints lovely, except the largest one……Take a look

Eeeeew, kinda looks like a ….

I’ve gotten all the ‘hard stuff’ over and done with first, or so I thought. Life’s taught me to generally avoid going for the low hanging fruit first, save the easy stuff for later when you need a boost.

Well, no matter what i’ve done (so far) in 12 iterations, have I been able to get a good looking space bar.

Now this has become my sole focus and roadblock for a successful print

Turns out that this is a combination of quite a few variables, I’ll list a few and probably follow up another time with clicky links and research

  • Exposure times are wrong –
    • They could be , I’ve really just gone and shoved stuff in to print and hoped for the best with standard settings. I Have now tweaked up the settings a little bit to 2.2s per layer due to mixing pigment in, and have had no real failures. I’ve also increased the first layers exposure times to 30s, still seeing minor issues there
  • FEP tension is wrong
    • Not really, This is a brand new printer, i’ve had zero catastrophic failures and have been overly cautious monitoring (and catching) early delamination from the print bed issues – Three times now
  • Bad Resin
    • Possibly. I’ve 3 types (all anycubic) and seeing the same on all 3
  • Temperature
    • Possibly, lots of people have been reporting issues in cold climates, I use the printer in the conservatory and it’s sub 10 degrees C in there regularly
    • Low temperatures cause increased viscosity and warpage issues with fine features from the FEP pulling them through the thicker resin
  • MY FAVOURITE
    • Exposure –
      • Too low exposure times on fine edges cause resin to cure, but not as hard as it should. So, when the layer sets on the bed, when it’s pulled off the FEP, it warps as it’s soft. This, I believe is causing the sagging issues i’m seeing on that space bar – it’s printed upside down, so the supports hold the points up, and between the walls sag, like an electric line held between two pylons

My solution……

Probaly waaay too many supports, but this way, each ‘sag’ will be between supports that are just 1mm apart.

I’ve also nearly doubled the wall thickness to about 1.8mm – from 1mm

Blue lines show original thickness, gold shows it doubled

Hopefully now, this is the last step, Colour’s good, CAD is good, Supports are good.

I’ve ordered 2 Litres of clear resin ready to go and have a colour that’s not exact, but close and, importantly , very easy to re-create

Resin8 Earthy Brown, 3 ‘blobs’ of the end of a lollypop stick to 100ml of resin. and Black, 1 blob.

– The Rich brown used previously was too red. I’ll experiment a little with more black when running off the final tests

https://www.resin8.co.uk/opaque-resin-pigment—earthy-brown-7468-p.asp

https://www.resin8.co.uk/opaque-resin-pigment—black-2383-p.asp

Coming soon!, more kits in stock, and Keycaps – March 2021!

Anycubic Photon Print Bed drainer STL – posted to Thingiverse

Whilst developing the Commodore 64 mini keycaps and iterating the prints, it came clear that the caps are little buckets that hold quite a lot of resin.

I’ve been holding the keyboard over the tray to drain all this resin out, and it takes “ages”

So, when you can use CAD and have a few 3D printers , you go and spend time developing a widget to optimise the amount of time holding a build plate at an angle!

And by “spend time”, and “optimise”, I mean, take longer doing in CAD than the total amount of time that would have been spent holding the bed in the first place

I present….

60 degrees! version 1

Total amount of time in CAD, and reworking, maybe 3 hours…

Total amount of time holding a bed to drain, maybe 3 minutes.

Number of beds to hold to recoup time in CAD…60!

So, after 60 prints, I’ll have broken even on the time invested in making the thing!

Here it is in action!

Version 1 wasn’t as optimal, it needed shifting over to the left by about 30mm to give far more clearance on the case for everyone not printing 25mm high keycaps to be able to use.

60 degrees, version 2!

Released on Thingiverse – right here – for free! works a treat.

Is that a space bar in your pocket (sized C64 Mini) ?

Trial run 13 underway with the resin prints. Colour should be pretty close, and Supports fairly optimal.

Trial 12 failed due to insufficient base size on the supports, caught it at 5% so no problem there other than a quick cleanup. I’ll know how it’s gone in about 5 hours!

Also, did a quick tweak on the space bar! I’m printing both new and old to see how they come out

Do animated GIF’s work here?

Did some work on the Blinkenator also, and got sidetracked quite significantly with Fusion360’s parametric sketches. watch those tangent curves and how you constrain them!.

Mwahahahaha! C64 mini keycaps! The final furlong :-)

Has some successes with varying mixes of pigments! Wifey demanded I do a bronze one.

Fine adjustments needed only now and it’ll be a wrap.

….problem is, fine adjustments’ll probably take another 80% of the total :-p

Now, gotta figure out how to get Arduinos quickly as 50 wrong ones just turned up and due to Chinese New Year my expedited (expensive) DHL delivery won’t leave for a couple of weeks, D’oh! Best laid plans….

Well, final furlong for the 3D printing part anyway! Next step, investigating colouring in

Oops! One of these is near, the other is far away!

Keycaps! C64 mini stuff

Doing some sideways progress now.

When planning something, always allow time for ‘unseen’ stuff, or even anticipated issues that probably show up but you hope they don’t.

Is that a banana in your c64 mini or are you just happy to see me?

I’ve had two partially failed prints now, one fully expected and designed deliberately to see just how far I can remove supports or just how many I need to add

And, the one you see above. A large part of the bed failed to adhere so I stopped at 65%, just enough to recover the space bar…should have waited to 70% so I could grab a few of the bottom row also.

I’ve noticed slight warping in all prints but haven’t been that concerned till this failure.

On the plus side though, my new pigment colours arrived !

Yes, it’s reddy. So, it’s not ready.

I now have a grip on how the colours mix and can iterate a little closer to the original brown now! It doesn’t help that I’m red/green colourblind so, matching brown, in the evenings , in the conservatory in non optimal lighting is probably a worst case scenario for me :-p

But, I can get close now and can get the wife to tweak the formula

One thing I’ve noted is that it can get expensive iterating colors in resin prints! I’m mixing 100ml at a time now, to start a new colour I’m dumping the old 100ml into my grey bottle! Can’t wait to see what colour that comes out as.

now, back to the print fails

First – Levelling. Seems my bed has become unlevel a little, so, I’ll need to re-level. This seems to be an excellent tutorial which i’ll follow.

Now, the warping. It’s something that I didn’t really experience much with my standard Filament printer, but now I clearly can see that it’s a common, but surmountable issue with Resin printers.

So, some research

I’ll need to re-design the space bar at least!.

https://www.3dhubs.com/knowledge-base/how-design-parts-sla-3d-printing/

And

https://www.3dhubs.com/knowledge-base/how-design-parts-sla-3d-printing/

I’d put a small re-enforcement bar all along the space bar which seems to have been an error and may well be causing more warping!

I’ll do another post with the re-design!

JLCPCB – A small gushing appraisal

I know i’ve already made one blog post about these guys, but they really do seem to go over and above! why i’m posting again is at the bottom

https://jlcpcb.com/

How I found them….

Me, I’m a early 40’s bloke with a wife, two young kids and a passion for gadgety stuff that’s not really that mainstream. I really don’t get as much time as i’d like for tinkering, but when I do, I tend to be lazy and take the easy route to making things overly complicated 😛

Back 3 years ago, I purchased a lovely reproduction case from Retro Radionics for an old Sinclair Spectrum 48k . It was limited edition, fully chrome. I just had to buy it…..

Continue reading “JLCPCB – A small gushing appraisal”

C64 Mini Keyboard – Rev 4 PCB experiments

This’ll be a while away yet, but the REV4 PCB, has some new, experimental features that will possibly allow some extra functionality when used with stuff other than a C64 mini!

For the purposes of this kit though, the board is a little easier to solder due to slightly larger pads, I’ve also added silk screen ‘dots’ to the rear to show the only two pads you actually need to solder (or possibly one of the two if i’ve gone and goofed up the positioning! ).

I’ve removed the USB HELPER pads, these weren’t actually that useful

The other thing being added are pads that say ‘Joy’ – I’ve no idea if this will work, but my plan is to see if there’s any way to map the C64 Joystick onto the keyboard and then into a PC / MiSTer or other device with a USB socket. I’m putting these unpopulated pads on production boards as, now due to Brexit, it costs a fortune in customs fees and shipping for small orders of prototypes. I mayaswell order 50 boards which are tried and tested, with small mods on. If the mods don’t work, no loss – the boards still function just as sold.

If they work, AND i can develop the firmware, AND the software then it may add useful features for some people! But, my focus right now is getting the mini version perfect and not any extra features that require a lot of time for me to learn how to enable! If they’re ever enabled, i’ll probably spin them into a SMT only board so I can sell a ready assembled version for a little cheaper than the £60 i’m currently selling for

Also on this one, i’ve fixed the C64 header pin ordering to save people having to make an adaptor cable due to me swapping two columns and putting the rows in reverse!, D’oh!.

Anyways, enough waffle – on with the pictures!

C64 mini keyboard kit keycaps – Rev 6 and 7

Couple of successful prints! Rev 6 – just binging in stuff and hoping it works.

Rev 7 – more scientific and better CAD – all letters are now 0.2mm wider and deeper. This tiny tweak shows spectacularly well just how big a difference small changes can make.

Still some more CAD to do but soo close to final now!

Bottom row and space bar is Rev 7. Top 3 rows are Rev 6
Closeup of the better definition.

And, finally, the print itself. I’ve learned that supports are critical here. Lots of them!

There’s actually as much material here in the supports as there is in the keycaps, but if you scrimp a little and try to reduce the amount, check out the top left of the picture below. I lost the return key and a few smaller keys were taken with it.

This was a calculated ‘risk’ by leaving this section to just have the standard auto generated supports, every other area had super dense supports.

There will be a middle ground, which I’m working on as I’d like to offer these cheaply…less resin used = cheaper to make!

Also, note the rest of the supports. THey are SO EASY to remove. When I offer these keycaps for sale, again to reduce cost, I’ll probably leave them as you see here. Makes for more robust packing and if you decide to paint them, you already have them held down on a convenient stand!

Cured and partly disassembled