Spectrum Next Mini – All The Bits!

Another un-interrupted few hours of Laptop time and I’ve now gotten to the point where….All the stuff fits. Now it’s just small tweaks, printing and ‘production’ .

To get the PS/2 from the XBerry pi to the correct place on the rear of the case, I’ve put a small 6 pole ‘helper’ header over on the left.

Much Improved PS2 Port location – you can see the connector inside is now moved up and in-line with the other things!

I’ll then use just the small insert connector pins bit of the PS/2 connector and hand solder some wires for the first run. I might then make a fancy PCB for a final ‘final’ version

I’ve also now added a PS/2 port to the ‘rear’ of the keyboard PCB to save having a 4th custom PCB. For those that want ‘just a keyboard’ i’ll not be populating the rear side components (other than the Pi pico)

I’m now happy enough to pretty much freeze any problem solving, everything’s been solved now, so it’s down to relatively minor clearance and fitting tests now!

I’ll no doubt] need a few small revisions anyway and I’m really itching right now to make this thing Physical so soon, i’ll start using the 3D printers again, and be able to start back on the A500/ C64 and Blinkenator development!

For the Next Mini – some stats

Three Custom PCB’s seems to do the trick.

One Keyboard PCB (Duh!)

One Joystick Adaptor

One SD Card Adaptor

One Pi Pico

Nearly 70 3D printed parts in Six colours

The new tall switches and PS2 port – on the keyboard now
Some silk screen tidying needed

The two new PCB’s in Yellow – The ‘internal’ DB9 won’t be present on the Next Mini – it’s just there for a standalone product idea

Spectrum Next Mini – SD card

The Xberry pi’s SD card slot location isn’t ideal when putting inside a Scale Next Mini.

With the HDMI, EAR and power sockets all aligned to the back of the case, the micro SD slot sits about 13mm too close to the rear from where the ideal location would be on the side of the Next. – As can be seen below

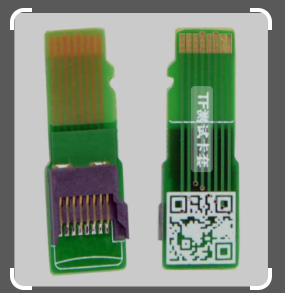
It also sits about 30-35mm too far from the side of the case. So, an adaptor is needed. You can buy these ‘micro Sd / TF extenders’ – But, none in just the right length (they’re close), nor in a slight offsetty-typey thingy.

‘off the shelf’ Micro SD extenders

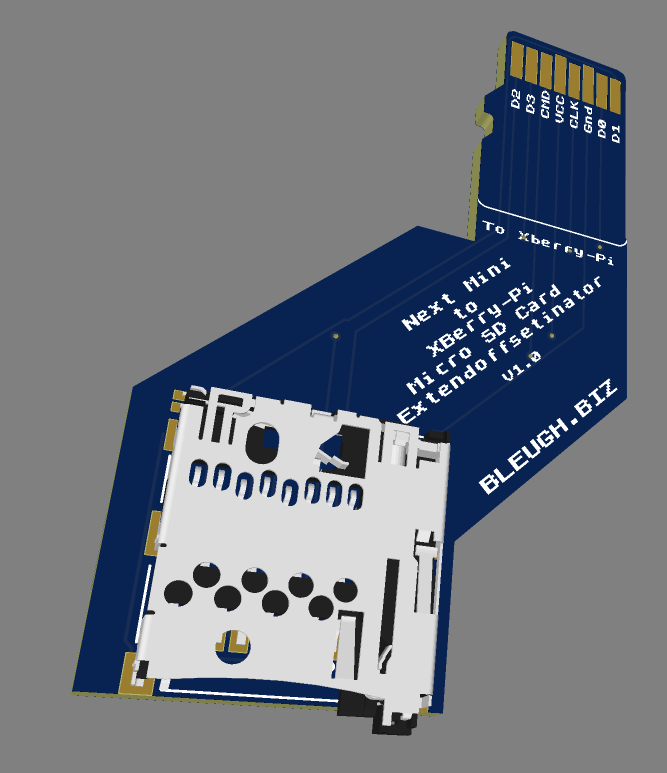
So, i’ve had to knock up yet another PCB!

Presenting the SD card offsetor thingymajig.

Turns out there’s a few projects online that use 0.6mm thick or 0.8mm thick PCB’s to plug into a standard slot and extend out TF / Micro Sd cards. Micro Sd cards are 0.7mm thick though, and few ‘cheap’ PCB places seem to do that thickness…

I’m going to try both and see what happens. Seems most have success with 0.8mm.

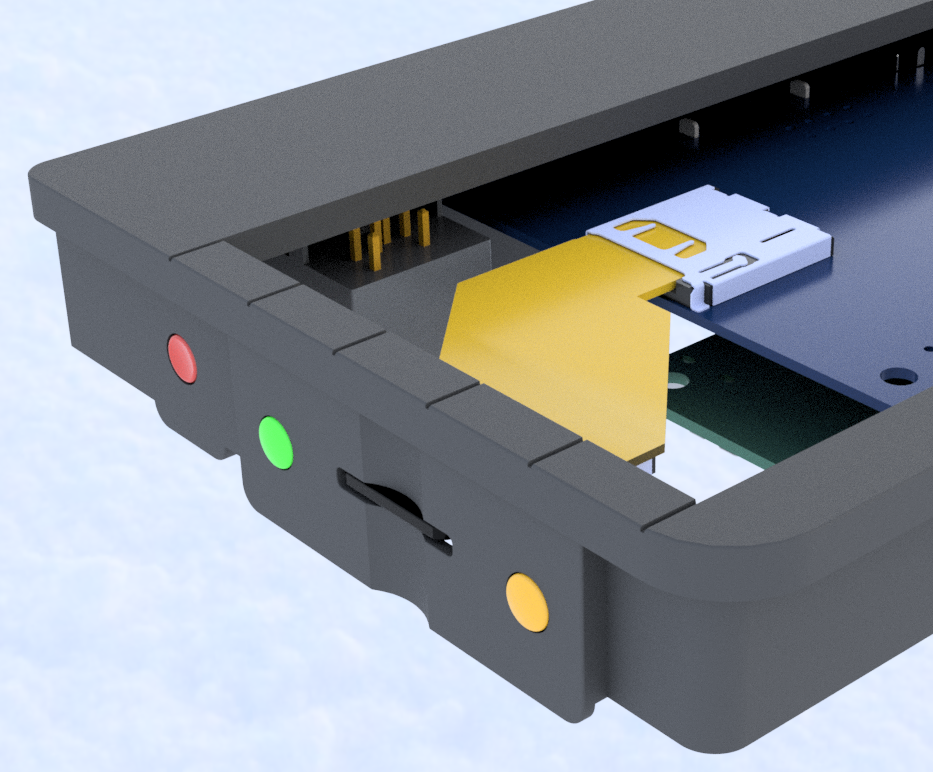
And, here’s the board sitting inside the Next Mini!

I suspect this board may change in size a little as it’s probably going to be easy to re-purpose it also for the 3 side buttons.

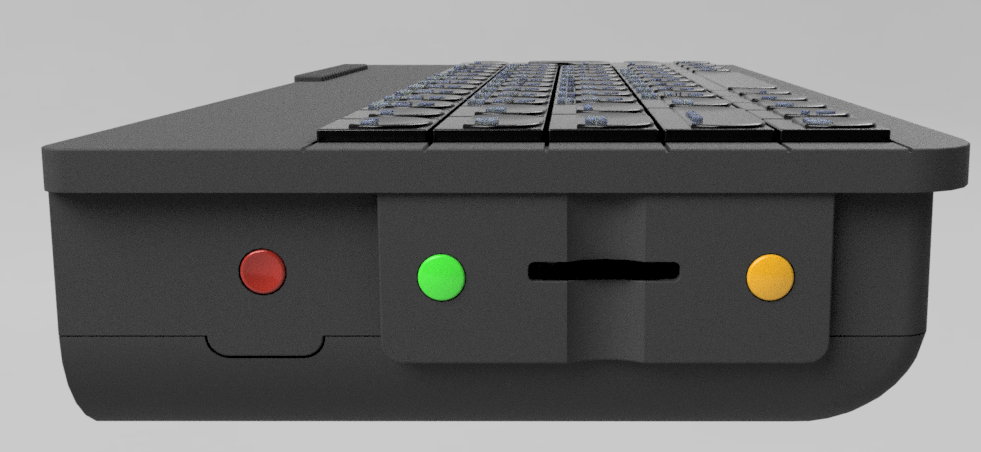
And, before you ask, Yep, all this is so that the Next Mini looks very close to the original, I think I’m close!

The reason my one looks ‘stumpy’ is that it’s exactly 50% of the length and width of the Next, but is exactly the same height!

Quick post to thank JLCPCB

JLCPCB have a fairly nice facebook group , and along with their EASYEDA group have done quite a bit to really get hobbyists producing PCB’s

Recently they reached out to me, having read through a lot of the waffle on these here pages and offered a small gesture of thanks for giving them a mention in the past, and, right now also.

so, in return, i’ll write even more about them 🙂 and, how I discovered them!

Back a couple of years ago, when wanting to make my first PCB for couple of decades, I tried KICAD, EAGLE, and a few other ‘free’ software packages. nothing was quite as easy as PROTEUS and , back then , LISA that I used in the mid 90’s in University. I’d resigned myself to a fairly intimidating hill to climb to get back into things…..

Then I found EASYEDA !. I knocked out my first ever PCB – the SpeccyPi, i’ll find it and post about it at some point.

EASYEDA seems to be a tool developed by both JLCPCB and LCSC to help people to purchase their products. i.e. both websites are quite well tied in for a simple ‘design, click, order’ solution. For us hobbyists, it really is a combination of ‘dream come true’ enablers.

Haven’t looked back since. I’m still using EASYEDA, because, like me, it’s quite simple and really works well.

JLCPCB have made almost all of my hobby PCB’s, have done a fantastic job with SMT assembly on my later PCB’s – with their partner site – LCSC , they offer an unmatched value for someone who’s a bit lazy and just wants a ‘1 click’ solution to ordering SMT populated PCB’s.

Really, if you are still using breadboard for your ‘production’ hackery, fire up EASYEDA quickly, bung a few components in, wait a week or two and marvel at your professionally looking PCB inside your widget. it’s shockingly addictive.

if you’re even slightly intimidated by SMT stuff – Fire up the JLCPCB website

do a quick search for resistor

select library type, basic

https://jlcpcb.com/parts/componentSearch?searchTxt=resistor

and see what’s avaialable!

That’s enough gushing!, give them a go!

I’m using them for my C64 mini keyboard kit, the Super LED Blinkenator 2000 and the Djordie’s joystick upgradenator!.

Spectrum Next Blinkenlights – part 5 – More PCB’s

Specnext inserts - 4mm Hole drilled - Bottom Up looking
One idea that I may need to do –  Partially Drilling out the 1.6mm holes to a wider diameter – to allow for easier Inserts PCB manufacture


Specnext inserts - 3.2 mm Hole drilled - Top Down
Potential idea – drilling out the hole from the underside – you can almost double the diameter without touching the case – This could be quite tricky to get right though…


Continue reading “Spectrum Next Blinkenlights – part 5 – More PCB’s”

Wanhao Duplicator 9 – D9 – Technical ‘stuff’


Getting right into the guts of this thing, there’s a few basic discoveries

There’s two names on the market –

Monoprice MP Maker Pro Mk.1 is an alternate supplier of this printer – Externally they look identical!

Hardware

Main Board

wanhao-duplicator9-main-controller-board-3d-printer-01-1200x1200__15863.1528170270.1280.1280_1024x1024

Continue reading “Wanhao Duplicator 9 – D9 – Technical ‘stuff’”