Should be here next week, not long till I find out how badly I’ve cocked them all up and how much work needed for a re-spin for production!
I purchased 2000 switches so can re-spin and re-test one, possibly two depending on which one (the Amiga needs 500 switches for 5 keyboards, spectrum needs far fewer!!)
Exciting times, now gotta get off my bum and fire the resin printers up.
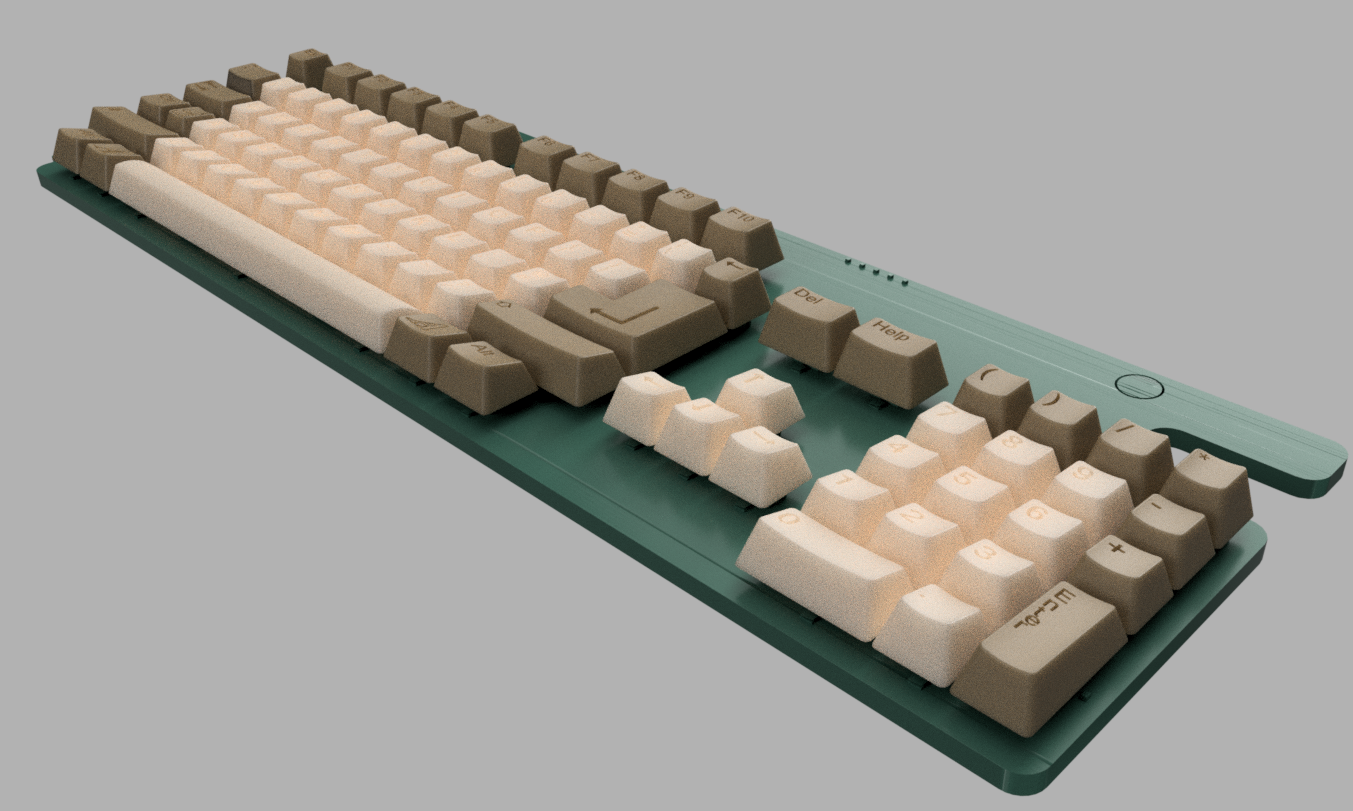
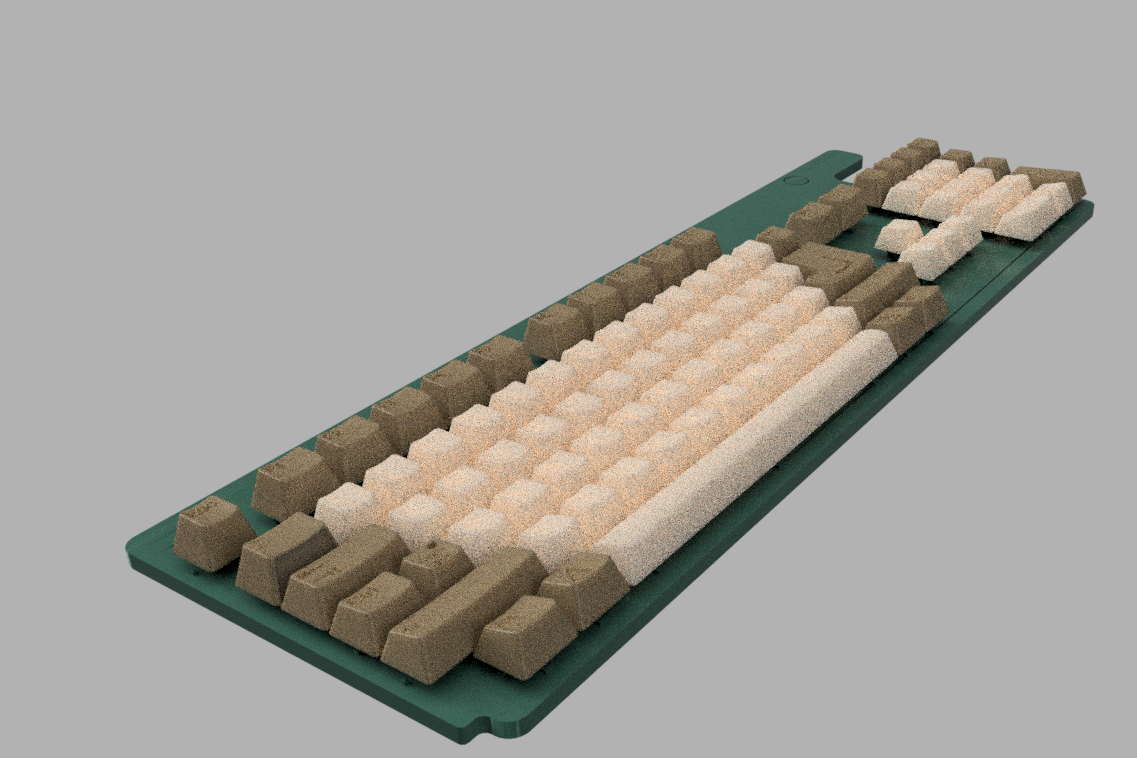
Yep, these are WORKING keyboards for the
The A500 Mini Amiga
The C64 Mini Commodore 64
And
The Spectrum Next Mini (an Xberry Pi case) which is a 50% X &Y (100% Z) scale next mini styled case.
I keep working with EASYEDA from JLCPCB as it’s just ‘easy’ and their PCB part has a great Export 3D model. For us metric types, just scale it by 0.254 and it fits like a glove. Very useful to align electronics and plastics in more complex models.
The new switches arrived
W0oOoot! Hear Teh Clickz… Clickey clacky. The custom made sample switches for The A500 miniature Commodore Amiga working keyboard project have arrived. They look great, sound great! And best of all, if they work great, I can improve my c64mini kits! pic.twitter.com/T51d1LwiLF
So, now to tweak the CAD to match the switches, make sure my resin printers are running, hand solder up a bunch of the sample switches onto an early revision keyboard, test and…
Thankyou everyone for your support! Sold quite a few more kits with keycaps than expected so frantically printing away more!
If you’ve paid for a kit or just keycaps, they’re all packed and ready to go! Should take between 3 days and 3 weeks depending on where you are on the planet!
Doesn’t look much but that’s A good couple of days of Labour and a two solid working week’s worth of printing time!!
I’ll hopefully be getting more time to update on other things soon 🙂
They’re all now working! I just need to tweak only 10 keys settings to significantly alter the entire keyboard – those 10 parent keys are copied through the rows
And I can now also alter all keyswitch holes simultaneously by changing two parameters.
Next step, latching mechanism in the holes (a small, sticky outy lump) and then figuring out how to print it!
Underside Wireframe view of the Return KeyWireframe view showing the F Key Geometry
It’s going to be a while yet, but I’ve finally fixed some long standing issues with the keyboard model i’ve been building in Fusion360
Doesn’t look like much!?
The main issue was a badly created model!. I’ve junked quite a lot and started back prior to when some odd dependencies crept in and really put some roadblocks on scaling things correctly and adding finishing touches.
But, it’s been worth it
That previous picture is the underside of the Keyboard – Those holes in the keys are 2.2 x 2.8 holes. it’s a first run at fitting the key switches into the keycaps. a lot more iteration needed to hollow it out a little and create some form of inbuilt snap-fit with stress relief, but…it’s a start!
The silver / grey keys over on the left are the ‘parent’ keys
If I make an update to the curves or size of a parent key – it rolls out to all the same sized keys in its row
if I need to iterate the hole size for the key switches, I simply change a few parameters for the hole size and it rolls out to all the keys in one go.
I’ve taken so long to develop it parametrically as it’ll now be so much quicker to iterate
Lots of parameters to change!
and, here’s a new render!……..going to spend the next few weeks iterating, and hopefully over Christmas , fire up the resin 3D printer for the first time!
Have been promising a long time to do this, so finally took a few hours to butcher another mini!
Some views are excellentAnother great view And the worst view
As you can see, for the most part, it’s pretty good, but NOT perfect
what I’ve discovered…..
2 part epoxy works best
Each keycap row is a different depth – the top one needs the least glue, row 3 the most
My errors here. I used a hard plastic glue from Bostick. it doesn’t grip well enough on the top of the keyswitches. I glued everything, waited a few hours, half the keycaps didn’t stick
glued the rest, waited, half again didnt’ stick…rinse and repeat about 6 times, adding more glue till finally they all stuck.
The 2 part epoxy stuck fast and hard! – but I used too much.
The repeated adding of more glue caused the multiple key levels you can see in the picture
Correct orientation of the switchesCorrect orientation from the top. (Except the shift lock…oops! That’s why I put extra switches in :-p)
A funny story about multi sourcing components and the importance of testing before shipping!
I used a supplier on Aliexpress to purchase a few thousand switches in a few orders over a few months but their prices went up quite drastically after the last order (doubled!!) they weren’t the cheapest to start with but were reliable and friendly, worth the extra ££
I found another supplier who did a good deal for a full bag of 4000! Ordered them and waited, very quick delivery and friendly also (will buy again!)
I built my first test new keyboard with the new PCB and switches
It didn’t work. Well, actually, it did! Work perfectly…but in reverse :-p …..
If you mashed every key simultaneously then only released the key you want to press….it worked!! Yeah, the supplier sent me 4000 ‘inverted’ switches! My fault for not checking prior to ordering, they ‘look the same’ so ‘must be the same’ was a wrong assumption on my part! (At least they all weren’t the shift lock type!!)
It’s a VERY easy fix though (found after several panicked hours of testing and building Keyboards)…rotate the switch 180 degrees and it’s perfect!
In each kit I’ve included a small errata note and list of basic instructions to help. It’s an annoyance but for you guys it really just means the silk screen doesn’t quite match the switch orientation so just ask first. Look at the pictures and of any doubt, email/messenger/twitter/Reddit me 🙂